How to Build a Fire: The Ultimate Guide
Building a fire is something that most people say they sort of know how to do, but they actually have no idea where to start. There is a primitive link between fire and man. This is exactly why I believe every man should know at least three distinct ways of building a fire without matches or lighters

How to Build a Fire: The Ultimate Guide
Building a fire is something that most people say they sort of know how to do, but they actually have no idea where to start. There is a primitive link between fire and man. This is exactly why I believe every man should know at least three distinct ways of building a fire without matches or lighters. If you want to prove your manliness to the ladies, go on a 5-day hike through the mountains or fight wolves in the Siberian wilderness, this is a skill that you absolutely need to learn.
You never know when you might end up in an emergency situation, where the protection of a warm campfire is the only thing keeping you alive, so I have compiled a master-list of ways to build a fire, whenever and wherever you may find yourself.
Note: It’s always a good idea to have some sort of fire-starting gear with you. If you don’t, you will find several alternative (but more complicated) solutions at the end of the article. Or check out our coal and firewood logs products.
What You’ll Need to Build a Fire:
When you were younger, your parents probably told you that you should never play with fire. Even if you’re lost in the vast emptiness of the forest, with nothing but a knife, there are several precautionary methods that you need to take before making a fire, to make sure that you don’t accidentally cause a natural disaster. Here is a list of things that you need to start a fire and, also, to keep it under control:
- Water: I don’t want to play Captain-Obvious here, but you should never, EVER, start a fire if you don’t have some water around to put it out once you’re done. You are the only person who can prevent a wildfire.
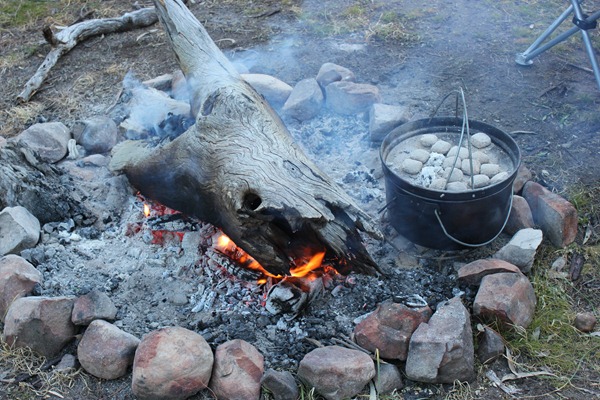
- A safe place for the fire:The first order of business is building a safe place for your fire. If you’re trying to light one indoors, you should go for a fireplace with a good grate. If you’re building it outdoors, you will need to make a fire-pit with rocks and dirt, away from bushes, grass and trees.

- Dry matches: It is possible to start fires with wet matches and other types of fire starters, but dry matches are the most convenient method.
- Logs: Will make your fire last for hours and hours. Gather dry logs that are a few inches in diameter. Logs can be cut into smaller kindling pieces.
- Kindling: Is wood that is slightly smaller than logs. In terms of size, it’s usually less than an inch in diameter (volume ratio: 1/8 inches to ½ inches in diameter). Kindling burns easily and will help you get your fire going at the beginning by transforming into a coal bed underneath your logs. Sources of kindling: fuzz sticks, dry twigs, small wood pieces, cutout pieces of wood etc.
- Tinder: Is the most important type of wood that you will be using to build your fire. Gather as many dry, small twigs as possible. Make sure they’re not green or wet. You can mix tinder with some scraps of paper. Other sources of tinder: dry plants, dry grass, birch bark, carcloth, dry leaves, fire sticks & starters, lint, pine pitch, dry needles.
If you’re wondering why lighter fluid didn’t make the list, I will tell you that it is usually frowned up. Quite frankly, it is dangerous and it will leave you with some very bizarre tasting marshmallows. Worst-case scenario, lighter fluid will help you successfully burn down the entire forest.
How to Build a Campfire Outdoors
Have you ever heard about the fire triangle or fire tetrahedron? The Fire triangle consists of fuel, air and heat, and the fire tetrahedron consists of fuel, oxygen, heat and chemical reaction. But you probably didn’t know that if you haven’t grown up in the woods, or laid a fire before. So here’s some basic info.

Image Source: Wikimedia
How do fires work?
Fire is the chemical reaction between two substances that trade electrons. To get a fire started you will need fuel and oxidizer (wood, potassium permanganate, glycerin etc.). The third thing you will need is heat. Have you ever tried to light a fire under a cold rain, or worse, with a cold rock? Not very effective, isn’t it?
The next thing you’ll need is an ignition source. Many people refer to it as heat, but I consider the ignition source a completely different entity. Next you’ll need a surface area, where your substances can continue to touch and react. The more surface area you have, the more your ‘things’ will burn. Lastly, you will need air to maintain your fire. Air is part of your chemical reaction, and a fire that is starved of oxygen will burn up really fast.
There’s nothing quite like cuddling up with your loved one next to a warm fire. To avoid the embarrassing situation of not being able to make your own camp-fire, here are a few essential steps that you should follow:
Step #1: Build your Fire Bed
If there is a designated fire area, you should definitely use it. If there isn’t, you have to make one yourself to avoid setting fire to the national park. First and foremost, choose a place that is as far away from trees and bushes as possible. Setting your fire over grass, especially dry grass, is a big no-no. I strongly recommend finding a patch of bare earth to make your own.
Clear the area thoroughly to remove dead branches, bark and weeds. Once the fire bed is clear, gather some earth or mud and place it onto a ‘platform’ that is at least 4 inches thick.
PRO TIP: If you want to build a roaring fire you can dig two 3 or 4 foot holes approximately 6 feet apart from each other. Dig a tunnel between the two. Start your fire in the tunnel. This will enable wind to blow into it. This type of fire bed is commonly referred to as the DAKOTA FIRE HOLE (diagram below).

Image Source: GrayWolfSurvival
Step #2: Gather your Firewood
You will need the three basic types of firewood mentioned above to start a campfire: tinder, kindling and logs. A general rule of thumb would be to collect wood that breaks or snaps easily. Look for dry wood.
If you can’t get anything but green wood you will struggle with a lot of smoke until the wood dries out. You can also add some paper scraps or wool for a little extra spark. In terms of quantities, you should have twice as much tinder and kindling than logs
Step #3: Start Laying your Fire
The secret to laying a great fire is allowing proper airflow (so that the flames have room to grow) and using proper fuel. There are several ways of laying a fire. Check out the four diagrams below for the most common ones. I’ll break down the basics for each of them.

a. How to Lay a Tipi Fire
Start by placing your tinder bundle in the center of your campfire site. Top it off with some kindling. Leave an opening in your tipi to enable wind to blow through it. This will keep your fire going. Add several layers of kindling to your tipi. Gradually decrease the size of your twigs. Use larger pieces of wood to surround your structure. Place a match under your structure. If the tipi was built correctly the tipi will light up. It will eventually fall. Once this happens, add some fuel logs to the fire and enjoy the flames.
b. How to Lay a Log Cabin Fire
Start off your log cabin fire with a typical tipi lay. You will need to work with a larger version of Lincon Logs to make this work. Use fuel wood to frame your fire on the opposite sides of your tipi. Set smaller fuel wood pieces across the first set of fuel wood (on the other sides of the tipi). Continue laying your campfire with shorter and smaller pieces in a pyramid shape.
c. How to Lay a Criss-Cross Fire
This is probably the simplest type of campfire. Place two pieces of fuel wood in an “X” shape. Top it off with some kindling and tinder. You can also add some paper scraps between the kindling and fuel logs for an extra ‘oomph’. Light your baby up.
Note: this type of fire will burn out quickly.
d. How to Lay a Lean-to Fire
Stick a long piece of kindling into the ground at a 30-degree angle. Make sure the end of your stick is pointing into the wind. Start placing tinder under your support stick. You’ll need lots of it. Fill out the spaces with smaller pieces of kindling around your tinder nest. Finish off the fire with larger pieces of kindling. This type of fire is similar to the tipi fire.
Here’s a really cool infographic that will teach you how to create a sturdy fire-pit:

Image Source: Country Stone
How to put out your Fire
Once you are done with the fire you have to ensure that it is put out correctly. Failing to do so might result in wildfires. The following practices should kill your fire once and for all:

Image Source: lhr
- Think ahead: It takes more than a few drops of water to put out a fire. If you’re planning on leaving in the next 30 minutes, that’s when you should start putting out the fire.
- Sprinkle water over the fire: the first impulse of most is to pour the whole bucket of water over the fire. This is bad because it will flood the pit and make it impossible for someone else to light a fire. Instead, you should sprinkle water over your fire until the charcoal and ember are put out.
- Stir the ashes. Use a shovel or branch to stir the ashes around. Once the steam starts to clear out, and you can’t hear any more hissing noises, you can stop.
- Put the back of your hand near the ashes to test the heat. If your hand feels to hot, the fire hasn’t been completely extinguished. Sprinkle water and stir the ashes again.
- Get rid of the ashes. No camper wants to light a fire on a site full of old ashes. Be a nice guy and dispose of your ashes.
- Patch up the ground. If you set your own fire bed you should replace the sod and dirt before you leave.
How to Make a Fire without Using Matches or a Lighter
Anybody can light a fire with matches or lighters as long as they have the correct fireplace set-up. But can you light a fire without an external fire source? Of course! For such a method to be effective you have to set-up a good tinder nest to nurture the sparks and embers.
FRICTION-BASED METHODS
1. Using Flint, Cloth and Steel
This is one of the oldest tricks in the book. Prepare your tinder nest with dry plants and wood. Take a flint rock (the type of rock that emits sparks). Hold the flint between your fore-finger and thumb. Make sure at least three inches of flint extend beyond your fingers.
- Cut a piece of cloth and hold it between the flint and your thumb (char cloths work exceptionally well). If you don’t have any char cloth you can use dry tree fungus.
- The next step is to scrape a piece of still (example: the blade of a knife), against the flint. Scrape until sparks begin to form. The char cloth or fungus should catch the sparks and generate a small flame.
- Quickly place it on your tinder nest. Gently blow onto it to nurture the flames. Start adding larger pieces of wood.
This method also works with a cell-phone battery.
2. Using Steel Wool and Batteries
Locate the terminals of your battery (the circular nodes at the end of it). Any battery voltage will do the trick, but 9-volt batteries are the most effective. Take a piece of fine steel wool and start rubbing your battery terminals against it. Through friction sparks will appear. When the steel wool starts to glow it’s time to blow on it to nurture your flame. Place your steel wool next to the tinder nest and continue blowing until flames appear. Once the flame is strong enough you can start adding larger pieces of kindling.
Alternative methods:
- Spread your steel wool so that you form a longer thread. The center of the thread has to be thinner than the rest. Connect one end of the wool to a node and the other to the second node. The thinner portion of the thread will create sparks.
- Take a 9-vold battery and rub a metal paperclip against the terminals to create sparks. You will need to do this near the tinder nest so that the sparks set off a small fire.
3. Using a Bow Drill
-
Here’s what you need to do to successfully start a fire with the help of a bow drill:
- Collect some dry plants, a piece of bark and small wood pieces. Look around for an object (heavy wood or stone) that you can use as a socket and a long, flexible piece of wood to use as your bow’s arm.
- Build the string of your bow using a piece of cloth, thin rope, strip of rawhide or shoelace (it should be strong enough to withstand friction). Tie it as tightly as possible to your bow handle.
- You can use a knife to carve small notches in to the wood for better grip.
- Find a large piece of wood (tree trunk or board), and cut out a small V-shaped notch in it. Stuff your tinder inside the notch.
- Find a spindle stick that you can loop your bow string around. The spindle stick has to rest in the middle of the bow string.
- Place one end of the spindle stick in your V-shaped notch.
- Use your non-dominant arm to hold the bow-string. Hold the socket against the other edge of the spindle stick with your dominant one.
- Saw the bow back and forth to spin your stick. This will quickly create heat at the base of your fireboard.
- As soon as flames appear hold out a piece of bark to nurture them. Gently blow into the flame while you transfer the fire to the tinder nest.
- Gradually add larger pieces of wood.
4. The Hand Drill Method
If you’re wondering how to start a fire in the most primitive way, then you should consider using the hand drill. All you need for this method is a stick, a tinder nest, tireless hands and lots and lots of patience and determination. Here’s how you can do it:
- Create a tinder nest with bark, dry leaves or grass and small twigs.
- Once again, sculpt the V-shaped notch into your fire-board or rock to hold the tinder.
- Now comes the hard part. You have to take a robust stick (spindle) and start twisting it between your hands, against the notch, until the friction generates a spark. The spindle should be around 2 feet long. While you twist, make sure to apply pressure on the board.
- It will take a while for your ember to form, so you have to be patient.
- Once the flames are light blow gently into the tinder nest until it is lit properly. Gradually add larger pieces of wood.
LENS-BASED METHODS
5. Using a Traditional Lens
When I was younger I remember watching a cartoon in which the kids were setting fire to ants. I tried to do that too. Sadly I lacked the patience and the ants kept trying to run away for some reason. I was very surprised to find out that you can actually use a lens or magnifying glass to light a fire, by focusing sunlight in a specific spot. If you can insert some water in your lens the effect will be that much more powerful.
The concept is single: angle the magnifying glass so that it focuses sunlight in a very small circle on your tinder nest. Obviously, this method only works when you have sun, so lighting a fire like this during the night will be impossible.
6. Using a Piece of Ice
This may sound strange, but you can actually make fire from ice. All you need is a lens-shaped piece of ice to focus the sun’s rays. This method is particularly useful during winter time. Here are a few tricks that will help you:
- The ice must be clear for this method to be effective. Procure some clear water (if it has impurities it won’t work). Fill up a cup or bowl and wait for the contents to freeze. The block should be around 2-3 inches thick.
- Take out the ice with a knife.
- As you probably know, an efficient lens has to be thicker in the middle and narrower at the edges. Use your knife to polish your lens.
- Angle the lens in a way that it focuses the sun’s rays in a very small circle (on the tinder nest) and wait for the magic to happen.
7. Using a Balloon or Condom
As you can see, there are plenty of ways to build a fire. This rather bizarre, yet extremely effective, method will help you generate a strong flame in no-time. All you need is a balloon (or condom), some water, and a sunny day. Fill up the balloon with water until it becomes spherical. Squeeze it into a shape that focuses the sun’s rays into a circle of light. Hold it 2 inches away from the tinder and wait. Once the flames form blow gently into the tinder nest.
8. Using a Chocolate Bar and a Can
I found this video on YouTube a while back and I was skeptical, but I have to admit that this method is pretty damn cool. To make it work you will need a chocolate bar, a soda can (or beer can) and the sun’s gentle rays.
- Start polishing the bottom of the can with chocolate. The chocolate will act as polish and improve the can’s reflective properties. Toothpaste also works if you don’t have any chocolate on you.
- Once the can is completely covered in melted chocolate you will have to create a parabolic mirror. In other words, the sunlight reflected in the can will form a single focal point directed towards the tinder nest. The tinder should be roughly one inch away from your focal point.
- Wait a few seconds for the flames to form and blow gently into the tinder nest.
9. Using a Flashlight as a Reflector
In the video below you will find several ways of starting a fire using water, lenses and the sun. It will also show you how to start your fire using a flashlight as a reflector. The concept is similar to that of the soda can: simply focus the light into one point with the help of the reflectors.
OTHER METHODS
10. Using Batteries and Gum Wrapper
This method uses the same principle as the one with batteries and steel wool. But while this may enable you to create flames easily, it’s harder to make them last. The trick is to cut your gum wrapper small enough to burn, but wide enough to maintain the flame. 9V batteries work very well, but you can also use two 1.5v to make it work. Have your tinder-nest close-by to transfer the flames quickly.
11. Using Chemical Reactions
Granted, some of these chemical reactions are impossible to recreate in the wilderness, but knowing them might prove useful someday. Some of these substances can be found in the first aid kit, others are harder to obtain. You can generate flames with the following chemical reactions without having to use a lighter or match:
- Chemical Fire #1 (sulfuric acid, acetone, potassium permanganate): Dip a napkin in acetone to improve flammability. Draw a few drops of acid into a glass pipette and dip it in the potassium permanganate. Dispense the mix into the napkin. The chemical reaction will result in fire and manganese heptoxide.
- Chemical Fire #2 (hydrochloric acid, zinc powder, ammonium nitrate powder): Mix the two powders together and sprinkle a few drops of acid to initiate the chemical reaction.
- Chemical Fire #3 (Sulfuric acid, sugar, sodium chlorate): Mix sodium with sugar and add a few drops of acid on top.
- Chemical Fire #4 (water, glycerin, potassium permanganate): Mix a few drops of glycerin with potassium permanganate crystals. You can accelerate the reaction with water. You can also mix potassium permanganate with antifreeze from your vehicle’s radiator.
- Chemical Fire #5 (brake fluid, chlorine): shave some chlorine tablets into fine powder and combine them with brake fluid. Laundry chlorine doesn’t work.
Some of these chemical reactions are extremely exothermic so you should make sure that you’re standing behind as they combust. You should also prepare a big tinder nest to nurture the resulting flames.
12. How to Build a Fire in the Rain
The infographic below will teach you how to build a fire in the rain.

Image Source: ScoutMasterCG.com
By know you probably know how to start a fire. Below are a few extra tips on how you can create char cloth as well as a few recommendations of fire-starters that you should have with you.
How to Make Char Cloth

I may have shared more than a few methods of creating fire, but you will probably be using only the first three or four ones. For this purpose you will need to craft your own char cloth. Simply directing a flame onto a pile of tinder or kindling won’t do much, but sustaining the flames with some char cloth will enable you to start a fire even under heavy rain.
Char cloth has been around for centuries. It is created through the process of pyrolysis, which basically means:
“Thermochemical decomposition of organic material at elevated temperature in the absence of oxygen.” – Source: Wikipedia
To make your own char cloth you will need sealable tin can, scissors, cotton, and nails. Since I don’t want to reinvent the wheel, you can read the full guide on how to create char cloth: here.
You should also check out this Prepper Stove guide from GrayWolfSurvival.